In my last
post I showed how to access route parameters in meteor application. In this post I will explain how to implement publish/subscribe in meteor application.
For development purposes meteor has added several packages which we should remove before final implementations. One package is
autopublish. In our current application, though we show/hide details depending on logged in users, any user can access all data using browser console.
But for users collections, which is provided by accounts package, will only show data related to current user. Because internally accounts package handle security for us.
Allow access for all data impact for security and also for performance. But we can remove those by removing autopublish package and allow access to those collections in a different way.
First we will remove that package.
Then add
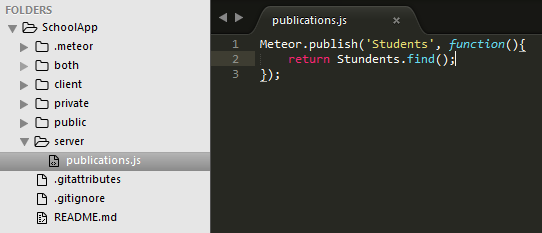
publications.js file into server folder and content should be like below.
Then we need to subscribe for Students collection. Every template does not need Students collections. So, we should subscribe for Students collection in an appropriate place while considering performance. So we will put that to routes which need students collection.
But we should think what will happen when we deploy into to remote server and access it. It will take some time to load student data for each client. Therefore it's better if we add a loading content. Add
loading.html file like below.
Then in
routes.js add
loadingTemplate like below.
Then modify
students and
studentDetails routes like below.
Download source code from
github.