You may have work with
Ant or Rake to configure automation of repetitive tasks. For
NodeJS,
Grunt has become one of the easiest way to automate your repetitive tasks.
I have explained how to use
Grunt with
ASP.Net MVC project in my earlier
post. In this post I will explain how to use
Grunt with your
NodeJS project.
First you need to install
grunt-cli package globally.
And then install
grunt as a
npm package to your project.
As developers we may need to run our project in development mode or test mode. We can do that easily using
grunt-env module. Install
grunt-env as
npm package.
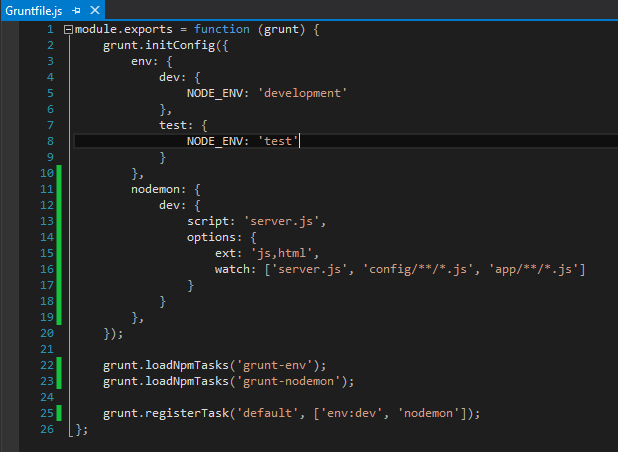
In the
GruntFile.js you can configure environment specific things easily.
When continuously developing your application, you will need to stop and start your application server frequently. To help with this task, there is a tool called
Nodemon, which you can integrate to your
NodeJS application using
Grunt. First install
nodemon as a
npm package.
Then you need to configure
nodemon grunt task.
In the options property, we configure
Nodemon's operation and specify to watch both the
HTML and
JavaScript files that are placed in your config and app folders.
Runt
grunt command in command prompt against to your project location.
Now do some changes in
server.js file or any other
*.js or
*.html file which are in given locations. You do not have to restart your
node server to check your changes.
nodemon will automatically handle that for you. You will see a message for that in the command prompt.
Download Source Code from GitHub.